10/23/2024 12:15:00 PM
Content Author: Stephanie Waegener, MNIT Office of Accessibility Digital Accessibility Analyst
In this article, we explore the built-in PowerPoint Accessibility tools and how they can help you ensure accessibility features are present in your presentations. We will demonstrate how to use the tools while you work and for initial testing.
It is important to understand the specific elements that must be present in an electronic document to ensure an accessible experience. The State of Minnesota has a Digital Accessibility Standard that requires our digital content, including electronic documents, to meet Website Content Accessibility Guidelines (WCAG) 2.1, Level AA and Section 508 of federal law.
If you want to dig deeper into understanding how these standards were developed, view our July 2024 blog “Update to State of Minnesota Digital Accessibility Standard Launches July 1.”
In general, accessible documents must have structural formatting in the form of headings and lists in logical reading order that allow users to navigate the document. They use descriptive alternative text that describe photos, charts, and graphs to users. When your documents are accessible, everyone can use them.
As you build your PowerPoint presentation, you can make your content easier for people to view by using the “Accessibility” tab. It contains several tools, including:
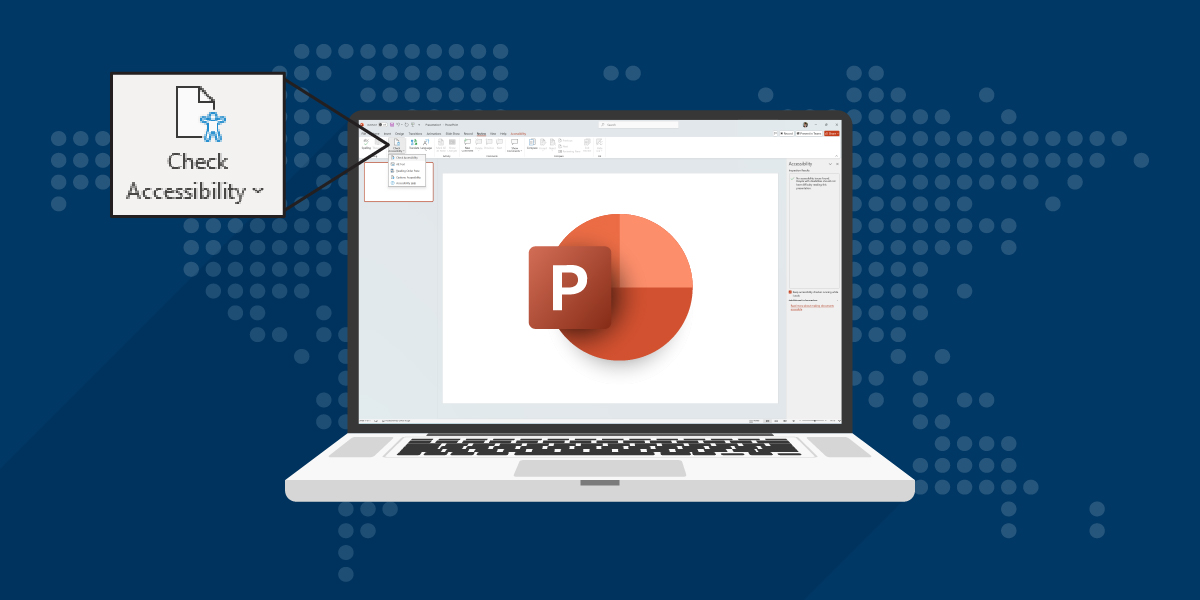
To manually launch the Accessibility tab with its set of tools, select Review > Check Accessibility (Alt+R+A1+A). The Accessibility tab opens, and you can now review and apply accessibility features, as well as check for accessibility issues. You’ll also notice an “Accessibility” tab is now available in the Ribbon.

The Reading Order Pane tool displays the order in which the slide’s content will be read or navigated. There’s a number next to each piece of content (object) on the slide to indicate its order in the sequence. Note: Objects without a number will not be read or navigated when they are marked decorative.
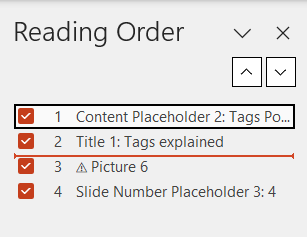
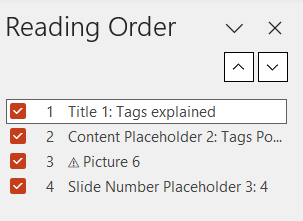
Note: Using the Reading Pane to change the reading order may affect the layout of the slide if object layering was used. You can undo the changes, but then you’ll need to find another way to make your slide accessible. You may want to ask someone who is knowledgeable in PowerPoint remediation to help.
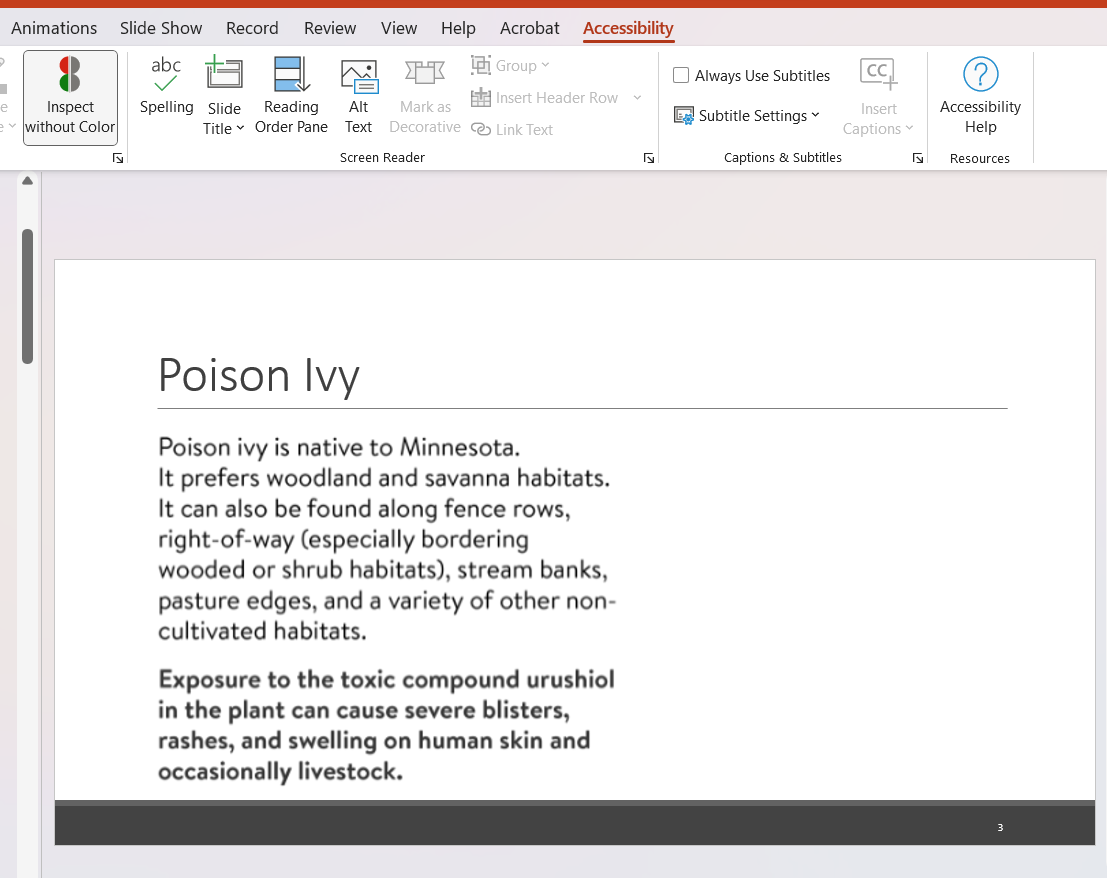
Slide with content which includes a warning message and only uses color to convey the importance:
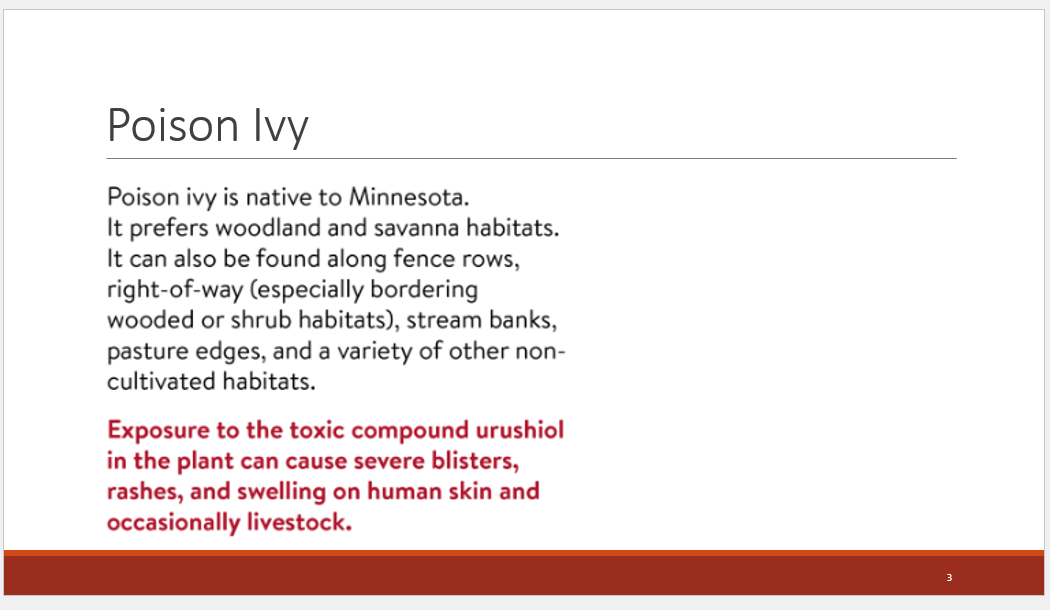
Now the same slide with the Inspect without Color tool still applied:
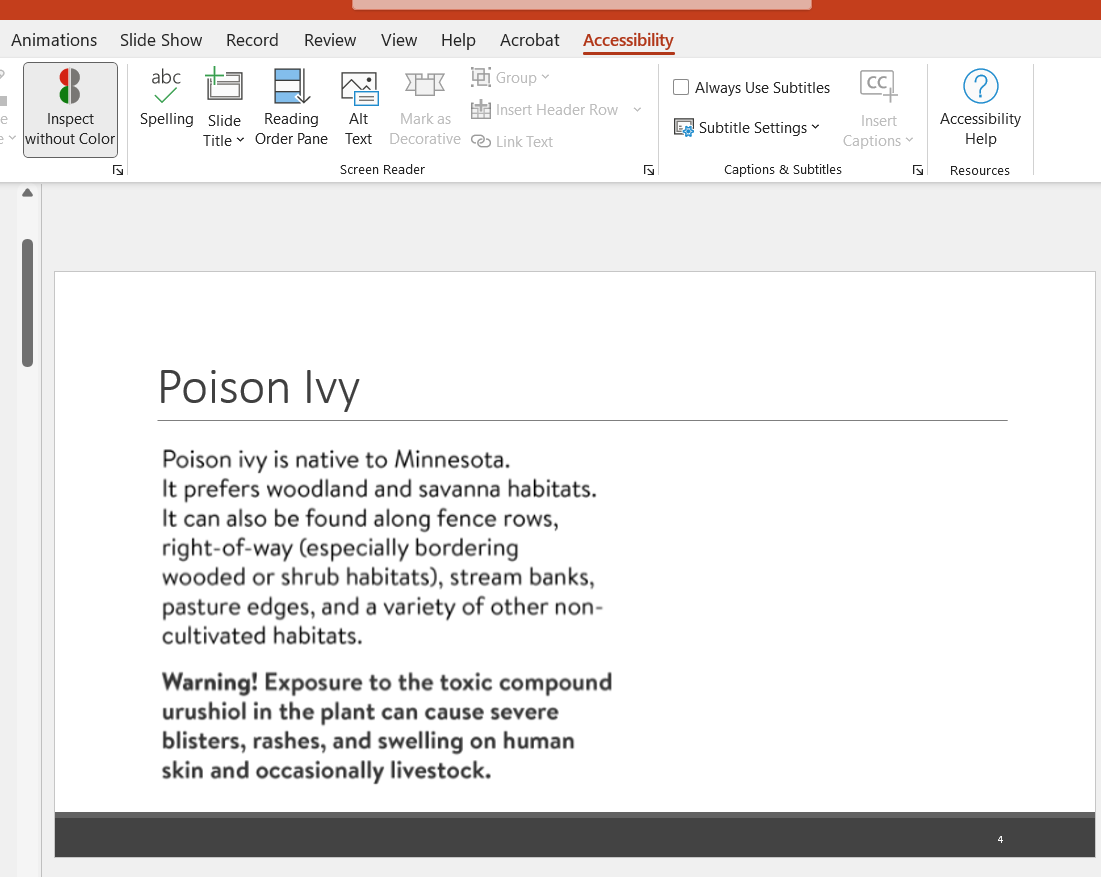
Adjusted slide to use text and color to convey importance:
This is the same slide, but the word "Warning!" was added in addition to the red color. With the Inspect without Color tool in use, the "Warning" text is still visible:
Within the Accessibility tab, the Check Accessibility tool will open an Accessibility Pane with the Inspections Report. This report moves a user through the issues in the presentation and recommendations on how to address each error or warning identified. It even points to the slide number the issue is located on.
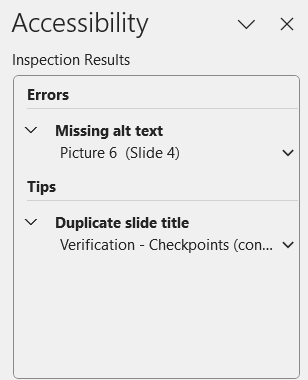
Note: If the Accessibility Checker’s Inspection Results state there are no accessibility issues found, it does not mean your work is done. As mentioned in the challenges section, you must perform manual tests. As you perform manual testing, keep in mind the POUR principals of accessibility. Is the document Perceivable, Operable, Understandable and Robust for the end user? Meaning, can the end user read it in the correct order while using their AT and understand what you’re asking for with no assistance form someone else? If the answer is “no” to any of these questions, then the document isn’t accessible, even if it “passes” the checker.
In previous articles about Microsoft Word's and Acrobat Pro’s built-in Accessibility Checkers, our state Digital Accessibility Coordinators provided a checklist to use during a manual review and gave tips about addressing testing failures. Check them out, they are relevant to PowerPoint, as well.
While tools are excellent to help aid the creation and testing of documents, having a knowledgeable person perform manual testing is also a necessity to ensure you capture all accessibility failures for your presentations.
We hope this article provides another tool you can add to your repository to ensure accessible digital content for everyone! In case you missed it, we also covered recommended testing tools for web pages in our April 2024 article “Website Accessibility Testing.”
Would you like to learn more about the accessibility work being done by Minnesota IT Services and the State of Minnesota? Once a month we will bring you more tips, articles, and ways to learn more about digital accessibility.
Accessibility
Accessibility

