Create the Personnel components
Tip: If you've already made Personnel components for a Personnel List page, or a Personnel Phone-Email Directory page, you can reuse those components in your Personnel Detail page(s). You don't not need to create them again, but you may need to complete additional fields like Biography.
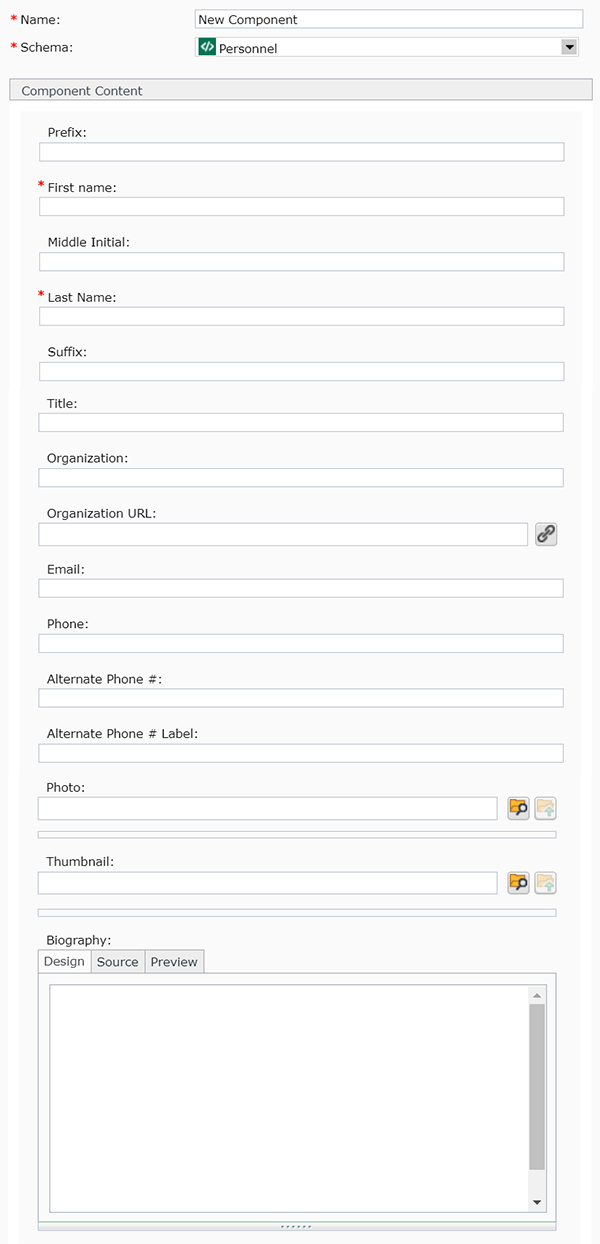
Personnel Detail pages show only one person per page. Below are the fields to complete, along with tips for completing them:
 Name: enter a name for your component here.
 - Schema: select Personnel
- Prefix: if your person uses a prefix, such as Mr. or Mrs., enter it here.
- First name: enter the first name for your person
- Middle Initial: enter their middle initial, if known
- Last name: enter the last name for your person
- Suffix: enter any suffix's, such as Sr. or Jr.
- Title: enter any titles, such as PhD
- Organization: enter the name of the organization this person is with
- Organization URL: enter the URL for the organization
- Email: enter an email address for the person
- Phone: enter a phone number for the person
- Alternate Phone #: if needed, enter an alternate phone number for the person
- Alternate Phone # Label: enter a label for the alternate phone number, such as "work" or "cell"
- Photo: this is the photo that will appear on the Personnel Detail page. To select a photo, click the browse folder icon
 , navigate to the folder where the photo is located, and select it.
- Thumbnail: this is the photo that will appear on the Personnel List page. To select a photo, click the browse folder icon
 , navigate to the folder where the photo is located, and select it.
- Biography: if you intend to set up individual biography-style pages for each person, enter the biography for the person here. This is the text that will appear on the Personnel Detail page. This is a rich-text field that accepts bold font, italics, bulleted lists, and more.
Save and Close the component.


 The first thing to build for a Personnel Detail page is a General Content component with the headline and introductory text for the page, highlighted in red in the example pictured. Below are the steps for creating this component:
 Name: enter a
  , navigate to the folder where the photo is located, and select it.