-
Inserting Images
Before you can insert an image, you’ll need to upload it into Tridion. If you need more information on how to do this, consult the section on uploading multimedia files. Also, make sure your image is properly sized before uploading it – this will save you the headache of having to re-upload it if the size is wrong.
Once the image is uploaded, place your cursor in the spot where the image will be inserted into the rich-text field. Then click the Image icon in the top ribbon.

Tip: If you want text to wrap around your image, enter the text into the rich-text field first. Then place your cursor at the beginning of a paragraph and click the Image icon. This ensures that when you insert the image and set the alignment for it, the text will wrap properly alongside it.
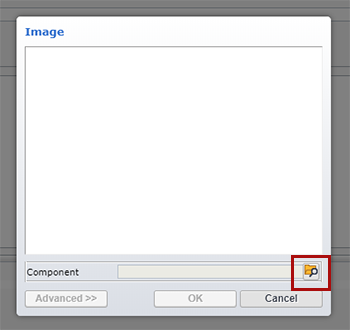
After clicking the Image icon, this pop-up will appear. Click the browse folder icon on the pop-up (circled below):
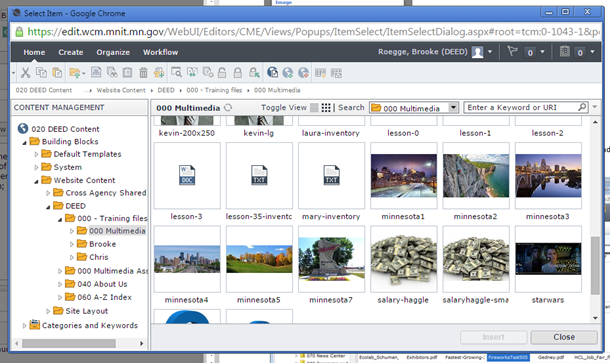
Another pop-up will appear. Use the new pop-up to navigate to the image you wish to insert and double-click on it:
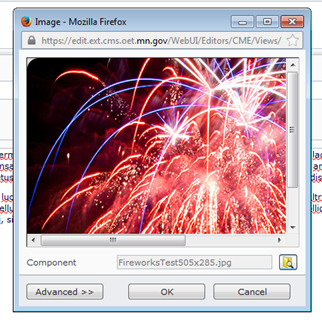
A preview of the image you've selected will now show up within the original pop-up window:
Click the Advanced button at the bottom of the pop-up to reveal additional fields.
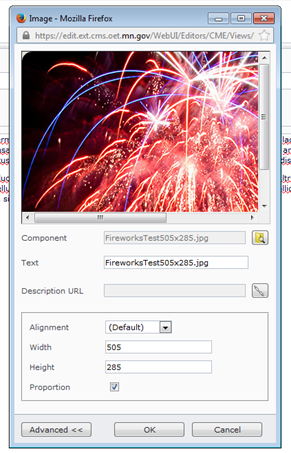
In the Text field, remove the filename and enter a description of the photo for blind and visually impaired users. The description should be succinct but also informative. You do not need to add words like “photo of…” or “image of…” to your description. For the photo pictured, a simple description like “firework exploding at night” is enough.
Please skip these fields:
- Alignment: you will alter the alignment another way, which is described in the section Aligning Images.
- Width/Height: Using these fields will cause the photo to pixelate and distort. If you need to alter the size of the photo, change the original in Photoshop and then upload it into Tridion again.
Once you’ve entered the text description, click OK.
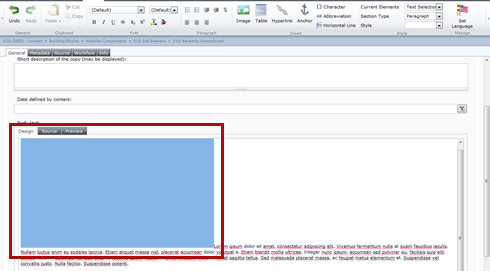
Your image will now appear in the rich-text field as either a blue or gray box (pictured below). To load a preview of the image in the rich-text field, follow the instructions below for Previewing Images.
-
Aligning Images
To align an image, first you need to select the image. If you’ve just inserted the image into the document and the image is still blue, your image is still selected and you can proceed to the next paragraph. If your image box is gray, just click once on the image to re-select it (it will turn blue when selected).
Once your image is selected, click on the Style menu in the upper right corner and scroll down until you see the options that begin with the word photo…
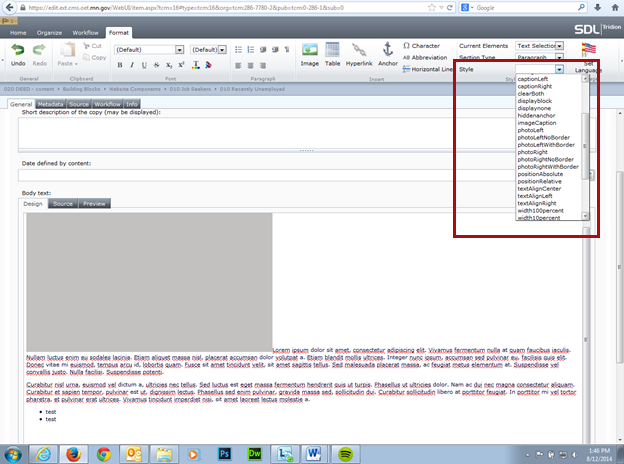
Of these menu options, we recommend using the photoLeftNoBorder, photoLeftWithBorder, photoRightNoBorder, and photoRightWithBorder options.
Below is a screenshot of a component's Body Text field with an image aligned to the right, using the photoRightNoBorder option.
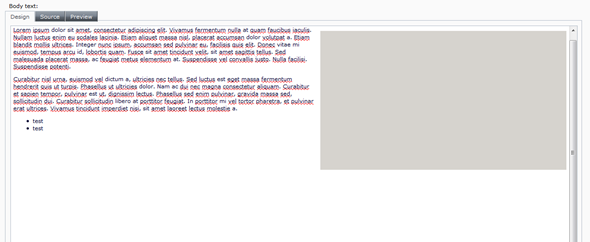
Tip: If you want your image to align with the top of a specific paragraph, place your cursor at the very beginning of the paragraph. Then when you align the image, the top of the image will sit flush with the top of your paragraph.
-
Responsive Images
Whether you've aligned your image or not, you'll want to ensure it is responsive. Responsive images flex to all device sizes and ensure that they don't fall off the edge of the page or take up too much space.
You have a couple different options for ensuring your images are responsive: you can either manually set the responsiveness in the code, or set it using the Style menu (plus some code tweaks).
Manually set the responsiveness
Manually setting the responsiveness requires adjusting the image's code directly. To do so, insert an image into any rich-text field, then click on the 'Source' tab for the field:

Next you'll see the raw HTML for the field. Look for the tag that starts with IMG for the image you've inserted, it will look similar to the example pictured below:

Inside that tag, locate the portion that contains the STYLE commands. It will look something like style="width: 400px; height: 100px;". Remove the height portion entirely, and replace the width in pixels with a percentage. For example, if you want your image to span the entire width of the page, your STYLE command will look like this: style="width:100%;" Or, for another example, if you only want your image to take up half of the width of the page, you'll change your STYLE command to say: style="width: 50%;" Using percentages instead of pixels means that the image will flex to fit different device sizes.
If your image takes up a smaller section of the page, say 40%, then you may want to wrap your text around the image by floating it to the left or right. Please use the instructions under the "Alignment" tab to align your image accordingly.
Set responsiveness using the Style field
You can also set the responsiveness using options in the Style field, but this requires a little extra clean up work.
Begin by inserting an image into any rich-text field, then click the Style drop-down menu in the top ribbon and scroll down to find the set of styles that begin with "width":

From that menu, select the percentage of width that your image should take up on the page. (Your options are between 10 - 100%.)
Once you've made your choice, click the source tab for the rich-text field you're working in:

Next you'll see the raw HTML for the field. Look for the tag that starts with IMG for the image you've inserted, it will look similar to the example pictured below:

This tag includes two commands at the end: STYLE and CLASS. In this case, the CLASS is trying to apply a percentage in width for the image, but the STYLE tag is conflicting with it. What you'll need to do is remove the STYLE tag and everything inside of it, but make sure you leave the CLASS tag intact.
The code will look like this after you've removed the STYLE tag:

That's it! Once you've removed the STYLE tag, your image should be responsive on the published page.
-
Editing Images
To edit an image after it has been inserted, you’ll need to select it. To do this, click once on the image and it will turn bright blue, as pictured below:

Once the image is selected (blue), both the Style menu and the Image icon in the top ribbon will activate for the image. You can either apply a different alignment using the Style menu, or click the Image icon to make adjustments to the alt text or size.
-
Previewing Images
If you'd like to see previews of the images (instead of a gray or blue box) in your rich-text fields, there is a way to do that.
Depending on your screen resolution, you may need to click the tiny arrow at the end of the top ribbon (indicated as #1 below), and then select Load Images from the menu. Or you may see the Load Images option without having to do step 1.

This will enable a preview of all images currently in the rich-text field:

Unfortunately, being able to see the images is not a permanent change. You will have to re-load the images each time you close and re-open the component.