Step 1: Create the File
To create a page, first navigate to the structure group (pink folder) where the page will live in Tridion. Structure groups are located at 050 [Your Publication] Website > root. From there, you have two ways to create a page.
Right-click Method
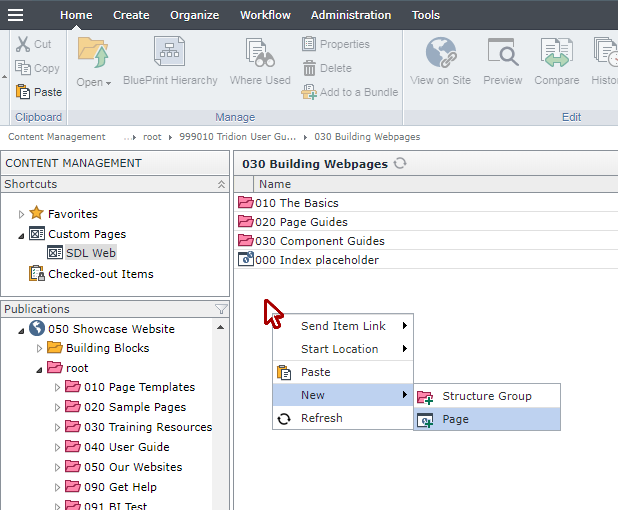
The first way is to right-click anywhere on the white space within the structure group. In the menu that appears, select New > Page.
Top Ribbon Method
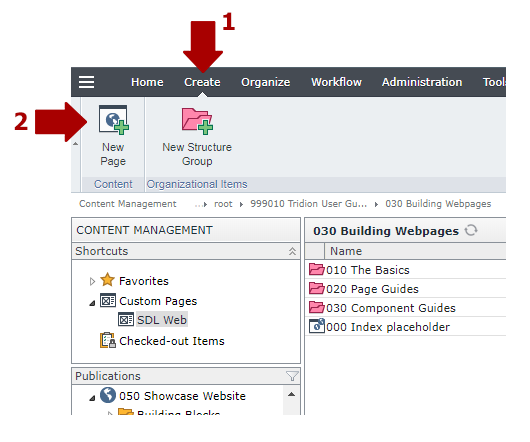
The second option for creating a new page is to use the top ribbon. For that option, using the dark gray bar at the top of the screen, select Create (#1). Then click where it says New Page (#2).
Summary
Either method works, and you can use whatever feels most comfortable to you. If you happen to get so many items in a structure group that you can no longer right click on the whitespace, then the top ribbon method becomes your only option for creating new page.
Step 2: Complete These Fields
Certain fields, marked with a red asterisk, are required and must be completed in order to save and close your page file. Other fields are not required, but are equally important to complete. Below is a list all files you should complete on all page files you create, and general tips for filling them in.
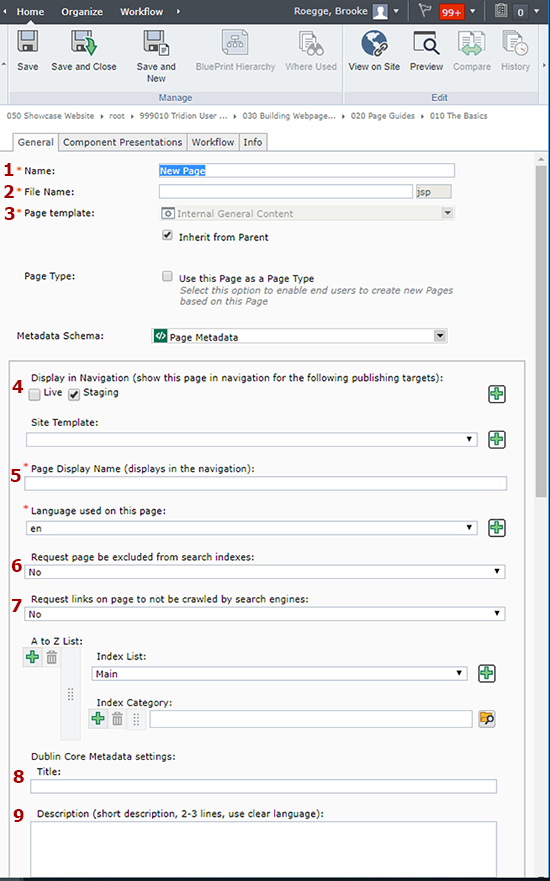
- Name: What you enter in this field does not show up anywhere on the website. What you enter in this field will only display within Tridion, and should be used to help organize your files.
- File Name: This field only accepts lowercase letters, hyphens, and underscores. At least one page file in every structure group must be named index. What you enter in this field will be placed at the end of the URL (like https://mn.gov/showcase/page-guides/create-a-page.jsp).
- Page template: Select your page template here. Unchecking the "Inherit from Parent" box will activate the drop-down menu above it. See the Page Guides section if you need help selecting the appropriate template.
- Display in Navigation: To show this page in the navigation, check both the Live and Staging boxes. To keep the page hidden from the navigation, leave both boxes unchecked.
- Page Display Name: What you enter here will be the link name that shows up in your top and left navigation (with the exception of index pages, described in #2 above - those link names are based on the structure group folder name). We recommend that the Page Display Name match the title on the page, otherwise it can be very confusing to users.
- Request page be excluded from search indexes: Selecting "no" means this pages will appear in search engines. Selecting "yes" means this page will be hidden from search engines.
- Request links on page to not be crawled by search engines: Selecting "no" means search engines are allowed to crawl the links on this page. Selecting "yes" means search engines will ignore links on this page.
- Dublin Core Title: This field is used by search engines to create the link to this page in their search results. This is an incredibly important field to complete, even though it isn't required. We recommend that it match the title on your page, with slight variations for better search results.
- Dublin Core Description: This field is also used by search engines, and it generates the snippet of text that appears underneath a link in search results. What you put in this field should be short, about 2 - 3 sentences, and summarize the content on your page.
Below these fields are additional Dublin Core metadata fields. Unless your agency has specific uses for these fields, we recommend leaving them blank for now. We can circle back and use them, as needed, to improve your search results.
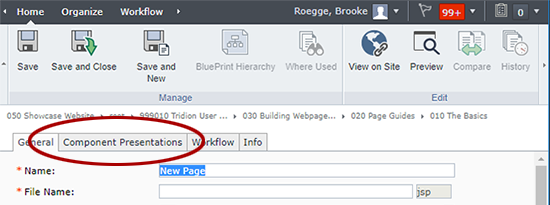
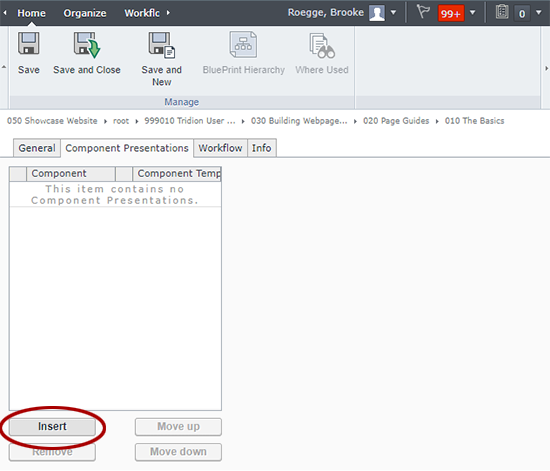
The next step in completing a page file is to insert components. To do so, click the Component Presentations tab at the top of the page:
On the next screen is a window that shows what components are in use on the page. For a new page, this screen will be empty. To insert components, click the Insert button at the bottom of the page:
A pop-up window will appear, and from here you can navigate to the component you wish to insert into the page. Select the component (A) by clicking it once, and then select the component template (B) you wish to use.
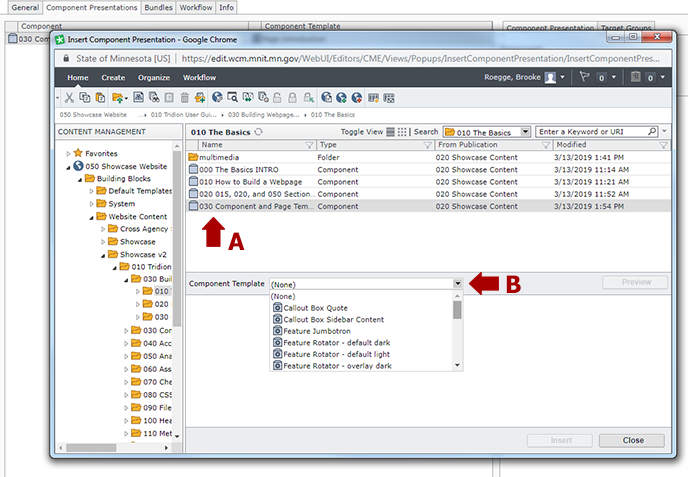
After you select the component template, the Insert button on the pop-up will activate. Click that to insert the component into the page.
Insert any additional components you need and then click Save and Close.
At this point you have created a page and are ready to publish it to Staging to view and revise as needed.