This optional header box, called a Toggle Box, can be used for highlighting whatever content you would like. This is a rich-text field, so you can add links, images, bullets, etc.
In the field on that page, enter the URL for the Twitter account you'd like to embed. For example, if you wanted to embed the MNIT Services feed, you would enter https://twitter.com/MNIT_Services in this field and hit enter.
Next, select Embedded Timeline from the choices that appear.
Follow one of these sets of instructions, based on what feed size you want to use:
If you wish to use the large feed shown by default: move on to step 5 below.
If you wish to change the size of the feed: click the "Set customization options" link on the screen. Then enter the Height and Width (in pixels) to create the Twitter feed window size of your choice. Once you're done, click the blue "Update" button, then move to step 5 below.
Copy the code shown on the screen and move to the next step on this page.
Create the Code Block component with the Twitter feed
Tip: To integrate a Twitter feed, you will need access to Tridion's Code Block component. If you don't already have access to this, please contact us and we can assist you.
In the 020 section, navigate to the folder where the components for the page with the Twitter integration will reside.
Create a new component and complete the following fields:
Facebook integrations look best when used in Flex Layout pages. If you follow this route, you'll need to create other content for the page, such as Flex Row Configurations, Flex Spotlights, Article Spotlights, etc. Go ahead and create those components at this time.
For the Page Template field, select the page template you wish to use. Twitter integrations look best on Flex Layout pages, but if you're unsure which template to use, you can leave this as the default Internal General Content.
Click the Design tab.
Click the Add button:
Navigate to the General Content component you created in step 1, select it, apply the Page Introduction or General Content component templates, and insert it into the page.
Navigate to the Code Block component you created in step 3, select it, apply the Code Block component template, and insert it into the page.
Navigate to any other components you created, apply the appropriate component templates, and reorder them as necessary.
Close the Insert Component Presentation pop-up window.
When you've completed all the steps above, then all you need to do next is publish your page.
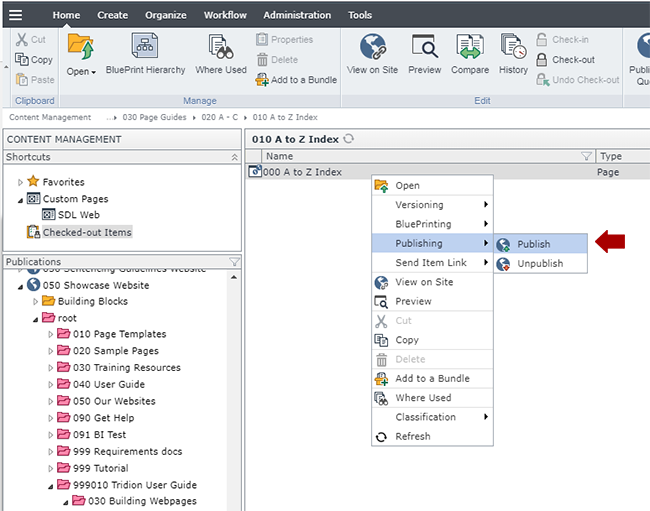
In the 050 section, navigate to the page you built in step 3, right-click and select Publishing > Publish.
Select the site you wish to publish to and click Publish. This will send the page to the publishing queue.
Verify the page looks like you want it to, and edit/republish as needed.
Technical Specifications
Below are the types of pages that Code Block can be used with. Please note that some page templates may only allow you to insert videos at the top or bottom of a page, such as Toggle Lists.