Prepare and upload the datagrid source file
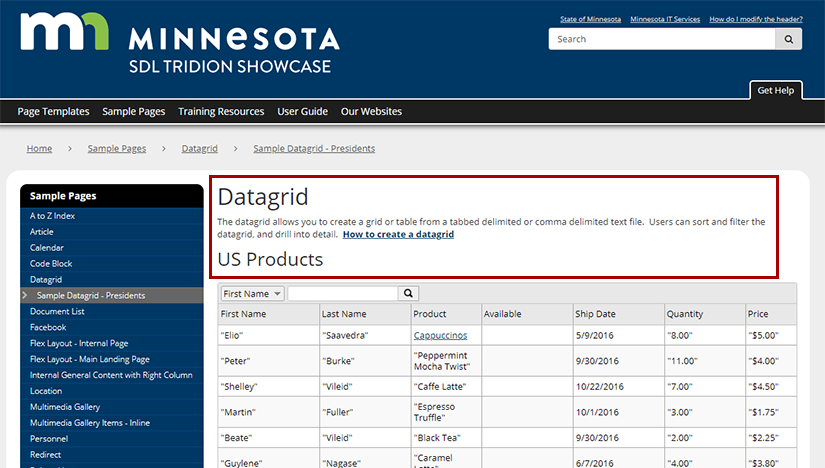
Datagrids are built using a separate file, called a source file, that contains your raw data. This step will walk you through the process of creating, preparing, and uploading your source file into Tridion.
Instructions for preparing your source file
The source file can be formatted as tab delimited (.txt), comma separated values (.csv), JSON, or XML.
Since the majority of people will be using .txt or .csv files, these instructions will focus just on those. If you want to build a datagrid using JSON or XML and need help doing so, please submit a support ticket and we will assist you.
CSV files
Tip: If your data contains commas, this will affect the way your data displays in the datagrid. The datagrid will read each comma in your data as an instruction to move the data to a new column. If your data contains commas, consider using a TXT formatted file as your source file.
The easiest way to create a CSV file is in Microsoft Excel. Here are the steps for doing so.
- Generate a spreadsheet that contains the data you wish to display in your datagrid, with data separated into columns.
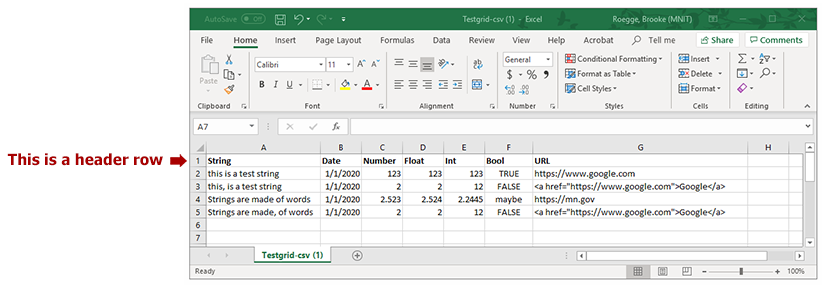
- If your spreadsheet has a header row (example pictured below), you will need to delete the header row.

- If your data contains line breaks within a single cell, you will need to insert HTML break tags where the line should be. For example, an address in a spreadsheet should be formatted like this:

The reason for this is because if you simply try to put the data on separate lines within a cell, the datagrid will interpret each line as data for a new cell. This will mess up your entire datagrid, because it will push data into the wrong cells. Using HTML break tags ensures that all the data displays within the same cell, and your entire datagrid will display properly.
- Using Excel's Save As feature, save your file in a comma-separated value (.csv) format.
Tip: Watch out for line breaks in your spreadsheet cells. Datagrids will read these as a command to move the next bit of data into a brand new cell. Use HTML break tags, as described in bullet #3 above, for breaks in the middle of data, and make sure you erase any line breaks that might be at the beginning or end of data within a cell.
TXT files
.txt files offer some advantages over .csv files, like being able to include commas in your data without problems. However, txt files are harder to edit and maintain. The most convenient way to create a .txt file is using Microsoft Notepad. Here are the steps for doing so:
- Create a file in Microsoft Notepad. Type in the data, and hit the "Tab" button between each piece of data that should be in a new column. Hit Enter to start a new row of data.
(You can also create the file in Excel and save it as a tab-delimited file, but doing so will put quote marks around any data that contains commas. To remove those quotes, you will have to save the file as tab delimited in Excel, open the file in Notepad, and remove all the quote marks from your file.)
- If your data has a header row, you will need to delete the header row.
- Save the file as a .txt file.
Including URLs in your data
If you are comfortable with writing HTML links and want your data to be formatted as a descriptive link, then you can format your URLs like: <a href='http://www.google.com'>Google</a>. (Please note the single quotes, rather than double quotes, around the link. Using double quotes will cause the datagrid to display incorrectly.)
If you don't want to mess with HTML, you can also paste a URL directly into your data, like: http://www.google.com. If you use this format, you should not have any other data in the same column (for CSV files) or tabbed space (for TXT files). You will also need to set the cell type to URL in the datagrid configuration file.
Uploading the file
Regardless of which source file type you selected, the process for uploading your file is the same. Please do the following:
- In the 020 section, navigate to the folder where the components for the Datagrid page will reside.
- Create a new multimedia component and complete the following fields:
- Name: enter a name for the file here
- Schema: select CSV or TSV data file (you may receive a pop-up asking you to reload the schema for the page, please click OK to proceed)
- Click the Load from Disk button
- Navigate to where your source file is saved and select it
- After the file has completed uploading, Save and Close the component


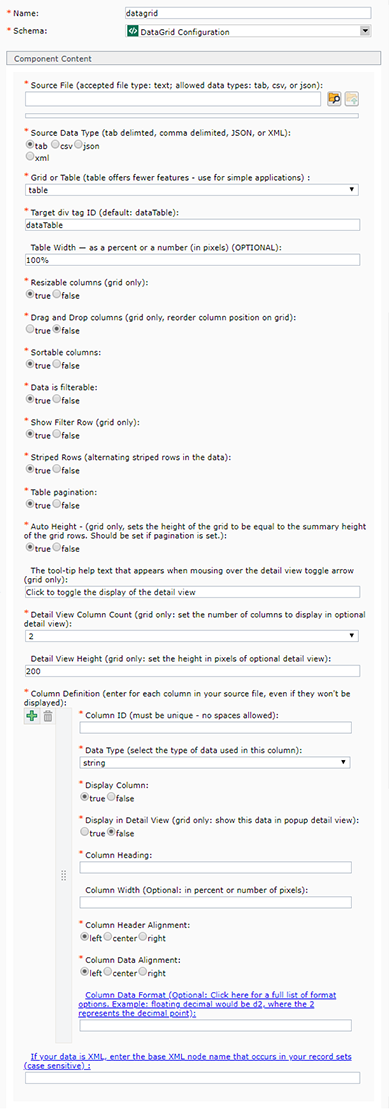
 Source File: select your source file by clicking the browse folder icon
  at the end of the Source File field. Then, navigate to the file that you uploaded in step 2 and double-click on it.
  to create additional sets of Column definition fields for the remaining columns in your source file.
